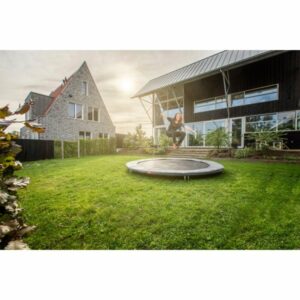
Trampolines continue to be the garden toy of choice for kids of all ages, but if the thought of a freestanding trampoline ruining your garden view fills you with dread, you might want to consider an alternative. InGround Trampolines are the ideal solution for those looking to keep the kids entertained without ruining your garden ‘vibe’. We’ve asked our Outside Play experts for their easy to follow tips for installing an InGround Trampoline in your garden.
Why choose an InGround Trampoline?

There are plenty of benefits to choosing an InGround Trampoline. Your little ones can play with reduced risk of them falling from a height and hurting themselves. You don’t need to consider chopping down any trees or foliage to accommodate a large structure and it won’t detract from your garden aesthetic. Freestanding trampolines can often dominate a garden, regardless of size or shape, plus you can eliminate the annoyed looks from neighbours as your little ones appear over their garden wall!
Our InGround Trampolines come in a range of sizes with contrasting outer rims for added safety when your little ones (or big ones) are playing. You can add extra safety measures to your trampoline by adding a safety net around it.
How to install an InGround Trampoline in your garden
Plot the area where you want to ‘sink’ your trampoline
Let’s assume you’re installing a round InGround Trampoline, the most common design for everyday play. Take a tape measure and secure one end to the centre of where you want to sink your trampoline. Walk outwards from the centre and use a stick or even a screwdriver to mark the radius of the circle. We recommend using washable paint, chalk or even flour to mark the circumference as you create your circle.
Get digging!
Check and then double check the measurements of the trampoline that you have bought before you start to dig. Depending on the depth of the trampoline you’ve picked, you can either dig by hand or hire a mechanical digger to start excavating the area. Make sure you consider drainage when installing an in-ground trampoline. A layer of gravel at the base will help create a ‘soakaway’.
Assembly time
Follow the instructions for your in-ground trampoline and prepare to lower it into the ground. Those living in an area with sand-soil may want to add some extra support to their hole by stabilising the walls before starting to assemble the trampoline. Take extra care to assemble your trampoline properly to ensure optimum ‘bounce’ and safety. Once you’re happy it’s secure in the ground – the fun really begins!
Check out the full range of InGround Trampolines available at Outside Play. With brand names you can trust such as Berg Trampolines, you’re in safe hands when you shop with us today.
———–
Beginning our journey with supplying and distributing products to companies nationwide. We decided to take the leap into retail ourselves. We are fully confident in our products and their sources. This means that we will only ever provide the best quality ride on toys and outdoor play equipment for you and your children. Our background means that we are able to provide you and your family with everything you need and an extensive knowledge of the products to help you enjoy them.
Want to learn more? Visit out website: www.outsideplay.co.uk


